White Bean and Kale Soup

White Bean and Kale Soup

I recently had a similar version of this soup at lunch one Sunday with my husband and thought it was delicious. I decided to try making it at home the following week. This soup is easy, filling and most importantly packed with flavor. Did I mention it is full of beautiful colors!?

White Bean and Kale Soup - Double Knotted Apron

What You’ll Need:

  • 1 bundle of fresh kale (or you can use the prepackaged kale in the produce section)
  • 2 cans cannelloni beans, drained and rinsed (also known as white kidney beans)
  • 1 can unsalted diced tomatoes, strained
  • 4 cups no salt added chicken stock
  • 2 cups water
  • 1/2 white onion, finely chopped
  • 3 medium carrots, finely chopped
  • 2 – 3 tbsp olive oil
  • 1 – 2 tbsp of kosher salt, to taste
  • 1 tbsp of freshly ground pepper, to taste

In a large pot, drizzle 2 – 3 tablespoons of olive oil around the bottom and turn the heat on medium-high. After peeling and chopping the carrots add them to the heated olive oil. Stir for 3 – 4 minutes or until slight softening. The oil will start to take on a slight orange hue. Add a pinch of salt and pepper to the carrots while cooking.

While the carrots are sautéing, peel and chop half an onion and then add to the pot. Sauté until translucent and reduce the heat to medium. Add one cup of water for now.

Meanwhile, remove the kale leaves from the stems and give the leaves a fine chop. Rinse the leaves and drain really well. Add to the pot along with another pinch of salt and pepper then put on the lid. You want to add salt and pepper to each layer of the soup since the stock was not salted. It’s always easier to add more than to take away too much. Let the leaves wilt for about 3 or 4 minutes before removing the lid, simmering on medium-low heat. Give all of the veggies a good toss and stir.

Add in the 4 cups of chicken broth and extra cup of water. Salt and pepper the soup again. A pinch of two of each. Drain and rinse the two cans of beans and add to the soup. You also want to drain the liquid from the diced tomatoes and set aside. Add just the tomato pieces to the soup. Stir and cover. Once the soup comes to a slight boil, taste and see if you need to add any more salt or pepper and do so accordingly. It’s definitely a taste preference. After the soup boils, reduce the heat to a low simmer and let it simmer for about 45 minutes to an hour. This will help the flavors really come together.

If you are serving the soup the same day garnish it with a toasty slice of garlic parmesan bread or croutons. If you are making the soup in advance, the longer it sets, the better it gets! I would recommend no more than 4 – 5 days in the fridge. Freeze the remaining soup if you have leftovers or are making weeks in advance.

If you are vegetarian, this soup is still perfect for you. Switch out the chicken stock for vegetable stock and you are good to go!

Enjoy! Stay warm!

xo-M

Rich & Creamy Chicken Noodle

Rich & Creamy Chicken Noodle

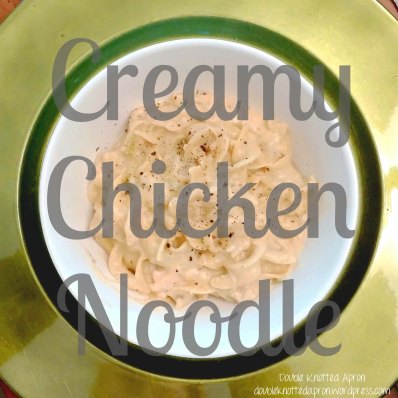
Whether you are looking for a comfort food kind of dish or a quick week night meal, you can’t go wrong with this easy Rich & Creamy Chicken Noodle.

Creamy Chicken Noodle - Double Knotted Apron

You most likely already have all the ingredients in your pantry and if not, it is a really inexpensive dish that will make four heaping portions.

What You’ll Need:

  • 1 can cream of chicken
  • 1 can cream of mushroom
  • 1 can cream of celery
  • 1 cup of (no salt added) chicken broth
  • 1 (13 oz) can of chunk chicken breast
  • 1/2 tsp kosher salt
  • 1/4 tsp fresh ground pepper
  • 1/2 package of egg noodles

What did I tell you… you probably just went to your pantry and pulled all of those ingredients out. If not, like I mentioned before they are all super inexpensive ingredients to purchase. If you don’t like canned chicken, you can always substitute for 1 lb. of chicken tenderloins and cook them in a skillet with some olive oil prior to making this dish. Once they cook through, shred or chop the chicken to add. If you are a vegetarian and like the sound of the meal but don’t want to fall off the band wagon, simply replace the cream of chicken for a second can of cream of mushroom, chicken broth for vegetable broth, chicken for fresh or canned mushrooms.

To whip up this delicious dish in less than 30 minutes start boiling your pasta water. You will need about 4 – 6 cups of water and one tablespoon of salt to add once the water boils. After adding the salt, pour in half of the package of egg noodles. Boil for 7-8 minutes of until al dente.

While the water is boiling, place a 3 quart stainless steel sauté pan (with a lid) on the stove. If you don’t have a stainless steel pan you can always use a large skillet. Add the three cans of soup, DO NOT add water as some cans may suggest. Turn the heat on medium-high until the soups are easy to cream together. Reduce the heat to medium and add the broth and can of chicken breast. Whisk together to help break the chicken breast chunks up and distribute evenly. Add the salt and pepper.

Check the noodles as they should be almost done. Once they are cooked al dente, drain and add them to the soup. Stir and cover for 4-5 minutes to let the flavors coat the noodles. Serve immediately and garnish with more fresh pepper.

Rich and Creamy Chicken Noodle - Double Knotted Apron

I hope you enjoy this rich and creamy meal that warm your belly and make you smile.

Enjoy!

xo – M

Homemade Chicken Noodle Soup

Homemade Chicken Noodle Soup

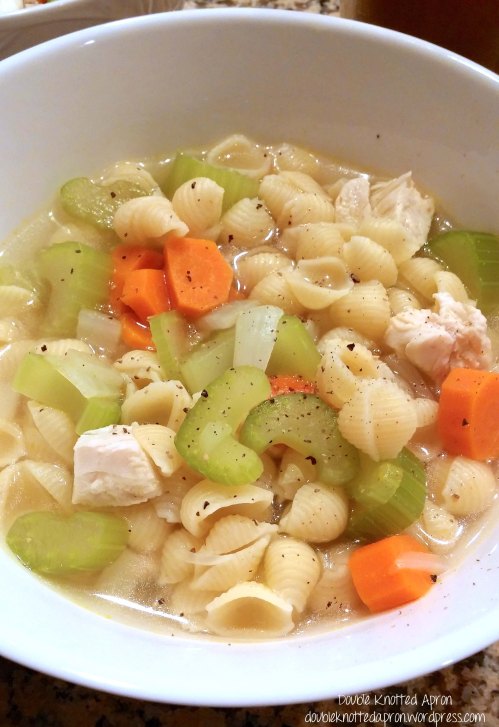
I love chicken noodle soup! Plus it never hurts to have a easy and quick recipe on hand when you have the sniffles.

Homemade Chicken Noodle Soup - Double Knotted Apron

What You’ll Need:

  • 1 lb. chicken tenderloins
  • 3 celery stalks
  • 4 large carrots
  • 1/2 sweet onion
  • 2 cloves garlic
  • 3 cups mini pasta shells
  • 4 cups chicken stock
  • 2 cups water
  • salt and pepper

Chop the onion really well and mince the garlic finely. In a large pot (my favorite for cooking almost everything is my 6 qt enamel cast iron dutch oven) heat 2-3 tablespoons of olive oil. Add the onion and garlic stirring to coat with the oil.

While the onion and garlic cook, chop the celery (wash first) and carrots (peel first) into bite size pieces. Add them to the pot and mix with the onions and garlic. Stir frequently while the vegetables heat through and start the softening process. When the onions start to look translucent add the chicken stock and water. Bring to a boil.

Meanwhile in a smaller pot, bring 6 cups of water to a boil and then salt the water. Add the pasta and cook until al dente or just tender. Drain and set aside.

Once the liquid boils add the chicken tenderloins and salt and pepper to taste. Cover the pot and reduce heat to a simmer. Do not lift the lid for at least ten minutes. After ten minutes, check the chicken to see if it has cooked through by removing one tender and cutting into it. If the chicken is white on the outside and no longer pink on the inside it is ready to be chopped. Remove all of the chicken tenders and cut into bite size pieces (or you can shred it) and return to the pot. You will want to add the pasta at this point. Taste the broth to see if it has a noticeable chicken flavor, if so set the soup simmer for another 15 minutes before serving. If the soup isn’t chicken-y (yes, I make up words) enough for you, add 1-2 chicken bullion cubes and simmer for 15 minutes before tasting again If it’s just right, ladle it into bowls to serve! (If not, simmer a little longer to let the flavors develop.)

Garnish with fresh cracked garlic and serve. Pair your soup with a fresh salad or bread sticks. I hope you enjoy it and if you have the sniffles, feel better!!

Enjoy!

xo – M

Country Fried Steak and Fried Mashed Potato Patties

Country Fried Steak and Fried Mashed Potato Patties

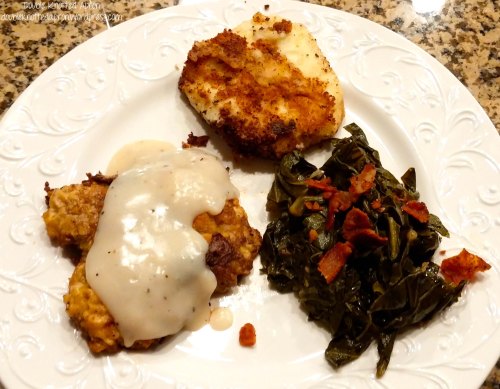
As promised in the Collard Greens You’ll Love post (and just a few days late)…here is my version of Country Fried Steak and Fried Mashed Potato Patties.

Country Fried Steak and Fried Mashed Potato Patties - Double Knotted Apron

Country Fried Steak is super simple to make and delicious!

What You’ll Need:

  • 2 cubed steaks (or however many you plan to eat, adjust flour and eggs per two steaks)
  • 1 cup flour
  • 2 eggs
  • salt and pepper
  • vegetable oil

Prepare a cast iron skillet over medium-high heat. Pour in the vegetable oil until the bottom of the pan is completely coated and stands about 1/4 inch deep. Heat the oil for at least ten minutes before frying. (A good way to tell if you oil is hot is to dip the handle end of a wooden spoon into the oil and touch the bottom of the pan. If bubbles form around the spoon then your oil should be hot enough.)

You will need two different pans for the flour and eggs. This is considered the dredging process. I like to double dredge my steaks to ensure that the flour stays on through the frying process. Pour the cup of flour into one of the pans and add in two good pinches of salt and about 1/2 teaspoon of ground black pepper. Whisk together to combine. In a separate dish, crack the two eggs and whisk until blended.

Take one of the steaks and coat with flour on both sides then dip in the egg and coat both sides. Repeat the process again and then coat with flour once more. Repeat the process for the second steak.  Once the oil is hot place the steaks in the skillet. Let them cook for about 3-4 minutes before turning. You will notice the meat starting to sweat (bubbly liquid forms on top, sometimes the steak will bleed) this is a good sign it is cooking through and you can turn the meat. Let the meat fry on the other side for about 2-3 minutes or until brown.

I used a pre-parckaged country gravy mix for my steaks. It’s easier and less time consuming than making from scratch. I usually by it in bulk from Sam’s or Costco.

***************

The Fried Mashed Potato Patties are yummy and different. I love potatoes in any form or fashion and if you are like me, these are sure to be a hit.

What You’ll Need:

  • 2 large russet potatoes (or 1 potato per person)
  • 1/4 cup cream cheese
  • 1/2 cup sour cream
  • 3 tbsp butter
  • 1/2 tsp salt
  • 1/4 pepper
  • 1/4 tsp garlic powder
  • 1 tablespoon jalapeño mix (adds extra kick, if you like ranch potatoes you could add 1-2 tbsp of ranch mix)
  • 1 cup plain bread crumbs

Peel and chop the potatoes into bite size cubes. Boil in six cups of water until the potatoes are tender. Drain and mash. Add all of the ingredients beginning with the butter, cream cheese and sour cream. Mix well.

In a shallow pan pour 1 cup of plain bread crumbs to coat the patties. Using your hands scoop out a palm full of potato mash and form a patty similar to a burger patty size. (If you are having difficulty forming a patty place the potato mixture in the freezer for about ten minutes to help harden.) Coat the patty with the bread crumbs on both sides and lay onto a lined baking sheet. (If you are making the patties in advance of your meal place them in the fridge until ready to fry.)

When you are ready to fry the patties just use the same oil that you fried the steaks. I fried mine directly after so the oil was still hot. If the oil is still pretty deep, pour a little off into a mug or cup until it cools to throw away so you don’t melt your trash bag. You barely want the skillet coated with oil so the patties aren’t greasy. Place about four patties at a time in the hot skillet and fry for about two minutes on each side or until heated through and golden. The potato patties will still be soft, but have a nice crunchy bread crumb exterior.

Plate all of your fine fixin’s and enjoy  your FRIED country meal. 🙂

Enjoy!

xo – M

Collard Greens You’ll Love

Collard Greens You’ll Love

I don’t know about you, but where I grew up greens are a speciality in most households. Whether it was collard, mustard or turnip greens they usually made a weekly appearance on the menu. I tried my hand at making collard greens for the first time this past week and they were a success. My husband loves greens and was excited when I made him a good ole southern dinner. He energetically gave my recipe two thumbs up after two huge helpings!

Let’s get down to business shall we. This post is all about the green!

What You’ll Need:

  • 1 large bag pre washed and shredded collard greens
  • 1 cup red onion, sliced
  • 2-3 cloves garlic, diced
  • 4 slices of bacon, meat separated from fat
  • 2 pinches salt
  • 1 tsp pepper, freshly ground
  • 2-3 tbsp vegetable oil

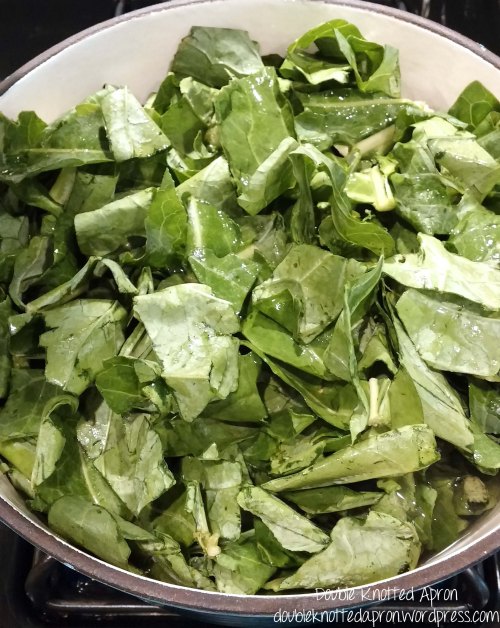
To begin, place the greens in a large pot and cover with water. Bring to a boil. Remove from heat and drain the greens and place them back in the pot.

Boiled Collard Greens - Collard Greens - Double Knotted Apron

Meanwhile in a cast iron skillet, cook the bacon fat with about two tablespoons of vegetable oil over medium heat turning the bacon once. After the bacon fat has cooked to a crisp brown remove from the pan and lay out on a paper towel to drain any grease. Once the greens are done and you plate them, crumble the fried bacon fat over the top for even more flavor and a little crunch.

Fried Bacon Fat - Collard Greens - Double Knotted Apron


In the same skillet that you cooked the bacon, return the pan to medium heat and add a tablespoon more of vegetable oil. Add the onion and stir for about two minutes before adding the garlic. Keep an eye on the onion and garlic for about five minutes or until softened.

Onions and Garlic - Collard Greens - Double Knotted Apron

In the pot with the greens add about 2 cups of water and the onions and garlic. Also add in the pieces of meat you removed from the bacon earlier along with two generous pinches of kosher salt and about one teaspoon of freshly ground black pepper.

Bacon Meat Seperated - Collard Greens - Double Knotted Apron

Bring to a boil and then reduce to a low simmer. Keep covered and remain on simmer for 2-3 hours for the best flavor. Stir every 30 minutes or so to make sure to distribute all of the greens and other ingredients throughout the juices (or pot liquor as we southerns call it). DO NOT DRAIN any liquid from the greens. Serve straight from the pot using tongs or a slotted spoon. (Side Note: If you have left over greens, store in an air tight container with the juices in the fridge. The greens will actually get better and more flavorful over the next few days.)

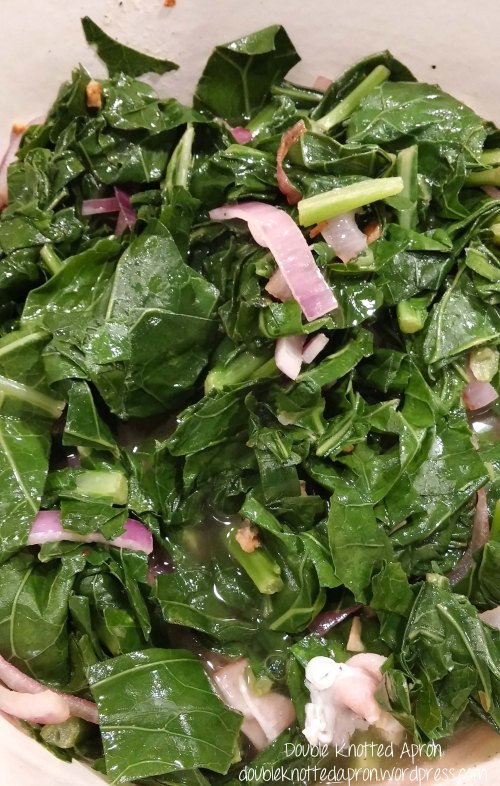
Collards with Onion and Garlic - Collard Greens - Double Knotted Apron

You will notice after the first 30 minutes or so that the greens will have taken on a darker green color. The juices from the greens will start to render and really mix with the onion, garlic and bacon creating a delicious masterpiece!!

Simmering Collard Greens - Collard Greens - Double Knotted Apron

While the greens are cooking enjoy some down time or prepare the rest of the meal that you will enjoy with the collards. I started working on the country fried steaks and fried mashed potato patties about 2.5 hours into the greens cooking time. It was one heck of a country-style meal we had and delicious too!

Home Cooked Souther Meal - Country Fried Steak with Fried Mashed Potato Patties and Collard Greens - Double Knotted Apron

We don’t eat like that all the time, but I love cooking up some of my favorites (which are typically fried) every now and then and indulging! I am slowly turning my sweet city-slicker husband into a good ole country boy one meal at a time! Couldn’t hurt that daddy wants to take him hunting this fall either, could it? 😉

I hope you enjoy your collard greens as much as we did! Look out for another post this week all about the country fried steak and fried mashed potato patties!

Enjoy and keep it southern!

xo-M